Saturday, July 23, 2011

DIY: Chocolate Facial

Hey girls! Sorry that I skipped yesterday, I had a really busy day and didn't have any time to do a post! So I decided to do something really special today! The inspiration for this do it yourself post came from a video I recently watched by bubzbeauty (Subscribe, she's fantastic:) If you would like to watch her video click here! Ok so we all know that pretty much ever girl loves chocolate right? We can't eat it all the time, but we can indulge a little more than we usually would by letting our face enjoy the perks of chocolate! This DIY facial is so easy I could make it in my sleep! Here are step by step instructions for how to make a delicious chocolate facial:
Ingredients you'll need
  • Cocoa Powder
  • Organic Honey
  • Plain yogurt
  • Small bowl
Instructions:

  1. Take a spoonful of cocoa powder and place it in the small bowl
  2. Take a spoonful of honey and add it to the cocoa powder and mix
  3. Add a spoonful of plain yogurt to the mixture and mix some more
  4. Cover your face in the mask avoiding the eye area
  5. Let it sit for 20-30 minutes
  6. Wash it off with warm water and a mild cleanser
  7. Moisturize with a really good face lotion
*I suggest wearing a shirt you don't care about while you are doing this just because it can be a little messy

Benefits of a chocolate mask:
  • Cocoa/antioxidants moisturize your face
  • Anti-inflammatory
  • Can prevent wrinkles from forming
Hope you enjoyed this fun DIY! Let me know if you try it:) Have a fun night everyone and I'll talk to you all soon!!

Thursday, July 21, 2011

Tutorial- Night Out!

Hello all my gorgeous followers! Today I am posting a tutorial using the makeup I bought yesterday at Ulta! This look is really good for a night out with the girls, or a date! I wouldn't normally wear this as a day look because it's pretty bright! *this look was inspired by a tutorial I watched from makeupgeek on youtube, I wanted to do my own little twist and make it a really affordable look. Hope you enjoy:)
Start by priming your eyes from lid to brow with your favorite shadow primer, this will even out any lid discoloration and help your shadow last all day (I'm using Stay Don't Stray by Benefit)
This is what your eye should look like after it is primed! All nice and even:)
Take any crease brush and your purple shadow (I'm using Flirty by Ulta)
Work the shadow into your Crease and Outer V. The end result should look like this
Take your copper shadow and any flat shader brush. (I'm using coppery bronze by Ulta)

Pat the shadow all over your lid, but keep it away from the inner corner
Take a different flat brush and pick your highlight color (I'm using Lustre by Ulta) Highlight your inner corner and your brow bone with this color, I'm not showing an after picture because it isn't very noticable

After you have highlighted your inner corner and brow bone take a copper/bronze pigment (NYX L21) and use the other side of your flat brush.


Pat the color on top of where your bronze shadow is. (If desired take a liner brush and line your bottom lash line with the copper pigment)


Next line your upper lash line with a dark brown or black liquid or gel liner (I'm using Wet n Wild Mega liner in 868)
Curl your lashes and add a few coats of mascara to your top and bottom lashes and voila your finished!
This is me right after finishing the look, I am also wearing the new blush I bought yesterday (Heartbreaker by Ulta)


 I hope you enjoyed this look, let me know in the comments if you try this out and link any pictures! Have a great day, and also let me know if you enjoy these tutorials!

Wednesday, July 20, 2011

$13 goes a long way

Hey girls:) I went to Ulta today on a whim not really knowing what I wanted to buy! I just knew I only had $20 so it probably wouldn't get me much! Boy was I wrong.... 3 gorgeous Ulta brand eyeshadows, 1 Ulta brand blush, and 1 NYX pigment later I still had 7 dollars! I absolutely love the feel of new makeup on my vanity! It feels so good! P.S. That gorgeous blue background you see is my window seat...Haha ok but really I'm amazed I cleared off enough stuff to take the pictures at all:)
This is everything I bought for only $13 (SHOCK!)

Ulta eyeshadows (left to right) Flirty (shimmery plum) , Lustre (shimmery champagne), and Copper Bronze (a coppery bronze haha) All of these were $2 a piece
Ulta blush in Heartbreaker (medium pink with peachy undertones) $3

Swatches top to bottom: Ulta blush in Heartbreaker, NYX pigment in L21, Ulta shadows in Flirty, Lustre, and Copper Bronze

Swatches left to right: Ulta shadows in Copper Bronze, Lustre, and Flirty, NYX pigment in L21, and Ulta blush in Heartbreaker


I got some better swatch pictures!!! Tomorrow there will be an eye tutorial using these products! Bye for now! xoxo

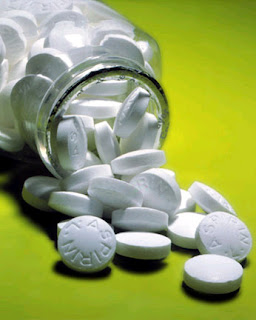
Aspirin- How to

Ok so this might seem like a very strange thing to post on, but aspirin has been a miracle drug for my skin! Skin you say? That's right! Aspirin is a pain reliever....but I have a secret about this little pill that I'm going to share with all of you! If you have red blemishes that are hard to conceal this is going to be a great investment for you! Red acne has always seemed to be really hard for me to cover up, which is a big embarrassment... So I decided to try something new. Here's what you do:)
  1. Buy a bottle of uncoated aspirin (it's actually really important that it doesn't have a coating on it)
  2. Depending on how many breakouts you have take 1+ pills and put them in a bowl. 
  3. Use the flat end of a spoon to crush the aspirin until it is a powder
  4. Add a few drops of water, or enough to make a pastey consistency
  5. Wash your face really well
  6. Cover your blemishes with the paste and wait about 20-30 minutes
  7. Wash your face again as you usually do and voila, your blemishes should be less red 
*Tip: I like to do this at night, because the excess aspirin left on my skin tends to work well overnight, but if you do wake up in the morning with a red blemish this will help. You can also use this as a mask and apply over your entire face if you have more acne to treat.
*Also...a quick disclaimer: This will not make your acne go away immediately...It's just something I do to make my blemishes appear less red not to completely get rid of them although it can help over time to reduce the amount of acne you get. Use a spot treatment as well if you want the blemish to completely go away.

Hope you enjoyed this little trick! Let me know if it works for you or if you have any other tips to reduce redness! Have a great day and I will most likely have another post today!

Tuesday, July 19, 2011

Just a Quick Announcement:)

Hello lovelies:) I wanted to do a quick post tonight and let you know that I am going to be doing a small little contest as soon as I reach 50 followers as a thank you to my subscribers! It's not products, because I want to save that for when I have more followers:) Let all of your friends know and try to get the word out for me:) Thanks girls! Have a wonderful night! Talk to you soon!

Swirled Nails

Hello Beautifuls! Yet another late night post for me, but I've had such a hard time figuring out what I want to post about lately!! I recently found this new way to do my nails. It takes some practice and quite a bit of time, but I think it is SO cool! I would've posted pictures of how my nails turned out, but my camera is currently not working so I'll just post a couple pictures of some I found online and liked!
Here is the link for a how to video: http://www.youtube.com/watch?v=U7bwL2S7auk And sorry the ladies voice is a tad bit annoying ;)  This black and and white picture is from the tutorial and the red, blue, and yellow is just one I found that I thought was super cool! Two things to remember when you are trying this method: Use colors that aren't super similar, and BE PATIENT! I didn't get the hang of it on the first try! Let me know if you try this out and link any pictures in the comments:)

Monday, July 18, 2011

My Top 5 Favorite Skin Care Products

Hey there! I had a lot of trouble deciding what I was going to post about today and then I decided I would talk about some of my favorite skin care products! Enjoy!

  • Jergens natural glow for face- This product adds subtle color to your face which is great because a lot of the time my face seems to be a little whiter than the rest of my body. It doesn't make my face orange either:) that is a huge deal breaker for me when it comes to self tanners. It also moisturizes pretty well considering it is a tanning product and not made especially for hydrating skin!
  • Cetaphil Daily Facial Moisturizer- I use this every day before I put my makeup on. It has been an amazing help during these summer months. My skin tends to be pretty dry around my nose and this moisturizer has helped SO much! I don't have flaky skin or any dry spots anymore. This product also has SPF 15 which protects my face from being burned, so that's a huge plus!

  • Biore Pore Unclogging Scrub- I use this product about 3-4 times a week. I tried Proactiv a while back and it didn't work for me... This stuff has worked a ton better for my skin! It exfoliates your skin and cleanses it. It also contains salicylic acid which is an ingredient that helps to treat acne.
  • Freeman Facial Enzyme Mask (Pineapple)- Ok so I have kind of a bad obsession with anything that smells like pineapple...Lotion, candles, perfume, etc.... Then I found this mask at Ulta and just had to buy it. I was skeptical about how well it would actually work, but I decided to try it anyway. This mask is in a tube and all you do is just cover your face with it and let it sit for 10 to 15 minutes. Immediately after you wash it off your skin feels pretty good. It doesn't last long though, I use this maybe once every two weeks. Really this is only on my favorites list for the scent, but it's a decent product!
  • Dear John (I believe this item is discontinued, which makes me very upset)- This Benefit Moisturizer is very dear to my heart. It is the first product I ever purchased from the Benefit Cosmetics line. It is also probably my favorite moisturizer I have owned within the past two years. It's nice and creamy, pretty much scentless, and worked some magic on my skin. It moisturized really well, but something that really impressed me was that it helped to clear up some of my blemishes as well. Another plus...the name of this product just makes me giggle! It's full name is Dear John A Movin' On Facial Cream. Benefit by far has the most clever product names, I almost want to buy them all just for that reason! 
Ok so sorry this post took so long to be put up on my blog, I just had a very busy day! Hope you enjoyed this and let me know in the comments if you have tried any of these products, and what your favorite skin care products are!

Poll

Hey girls! Hope you all had a fantastic weekend!! I haven't been able to think of what to do for blog posts, because I don't know what you all want to read. I started a poll that is in the left sidebar, if you would please vote for what you would like me to post on, and if it isn't an option there comment below. I will be doing another post today, but it's a surprise (mostly because I don't know what I'm posting on yet haha) Please comment below and I'll talk to you all soon:)

Sunday, July 17, 2011

Stay Don't Stray


Hello my beautiful followers I recently did an individual product review on the Stay Don't Stray primer from Benefit Cosmetics. If you want to read a full review check the individual product review page. I'm just going to sum up my feelings right here:) This product has been a lifesaver! My shadows used to wear off, or dull down halfway through the day because I never used to use a primer. This primer worked wonders for me! My shadow now stays bright and vibrant all day, without fail! I will soon be posting some pictures on the full review of my shadow right after I put it on and at the end of the day to show you how well the product really works. Comment below if you have tried this primer, or if you have another primer that you swear by! Also any requests you have for future posts just add to your comment!